
The data pulled from the Tevalis POS is often not organised in a way that’s fit for publication as a customer-facing menu.
This means that once your integration has been successfully completed, it may be necessary to create a separate customer-facing menu on the QikServe dashboard that can be customised accordingly.
-
In order to make this process as seamless as possible, please provide the name of your store(s) as it appears on your QikServe dashboard. This will help us correctly verify your account.
-
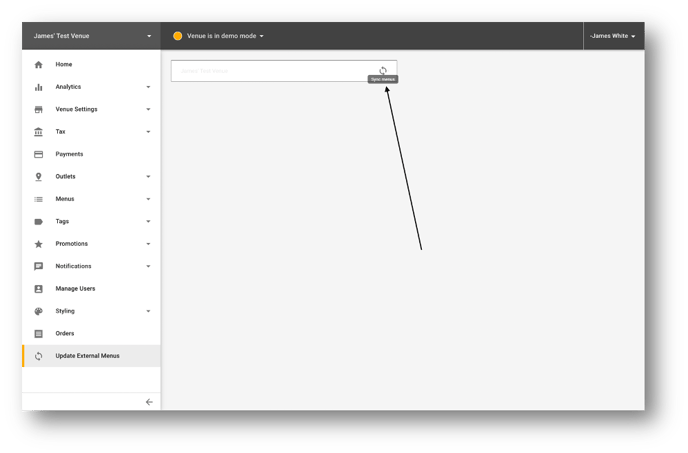
To pull the Tevalis menu from your POS till, you will find a new column at the bottom left hand side of your dashboard called ‘Update External Menus’. Click this button then click the Sync Menus option, where you will see a green pop up indicating that the sync was successful.
-
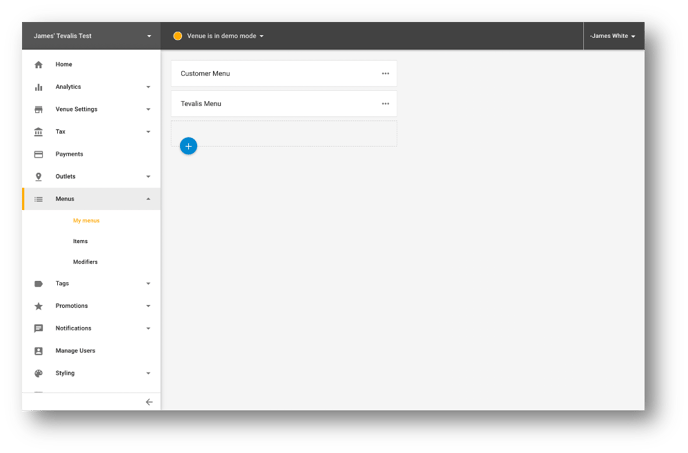
To create a customer-facing menu, visit your dashboard at QikServe, click on Menus, then My Menus. Here you will find the menu that has been pulled from your Tevalis POS. To make it easier to distinguish later, rename this menu ‘Tevalis Menu’. This can be done by clicking on the three dots next to the name where it then provides an option to edit the menu name.
-
Add a new menu to My Menus called ‘Customer Menu’. This will be where you customise the layout and appearance of your customer-facing menu.
-
In your ‘Customer Menu’, create and arrange the menu sections to your requirements.
-
To add items to your new sections, click on the blue ‘
 ' sign within the section, where you be prompted to 'Import existing item’. This will reveal a column on the right hand side of the screen with all the items that have been pulled from your POS till. Search for the items you want to add to the menu section then drag and drop them individually.
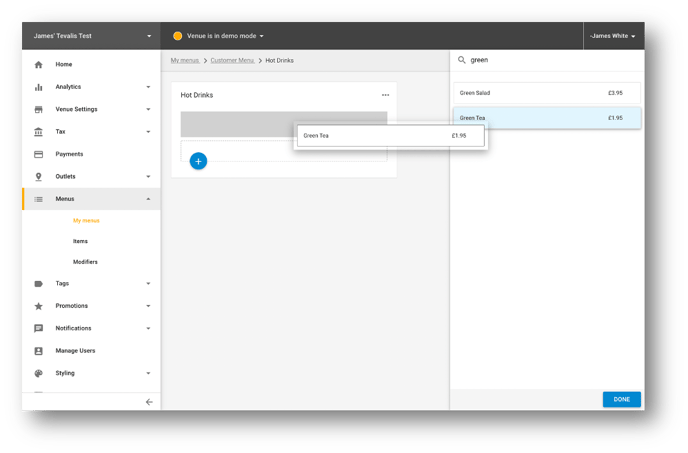
-
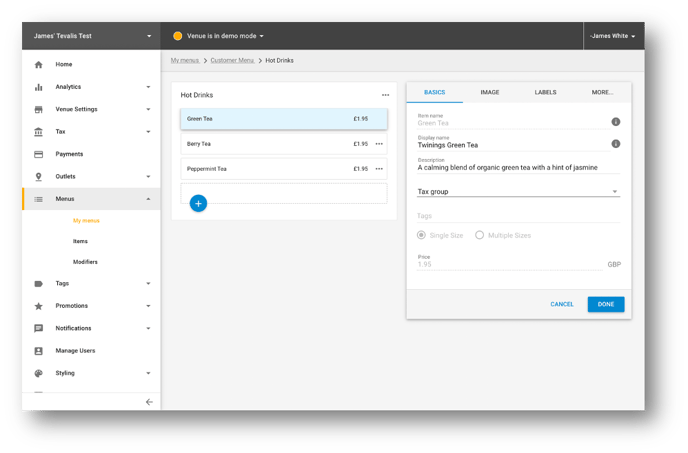
The display names, descriptions and images of items can either be edited once they have been imported into the relevant sections, or by searching for the item in the ‘Items’ tab of ‘Menus’.
-
To edit the modifier display names, visit the ‘Modifiers’ tab under ‘Menus’ and make the relevant changes. Just like items, modifier options can be hidden from the menu in real time.
-
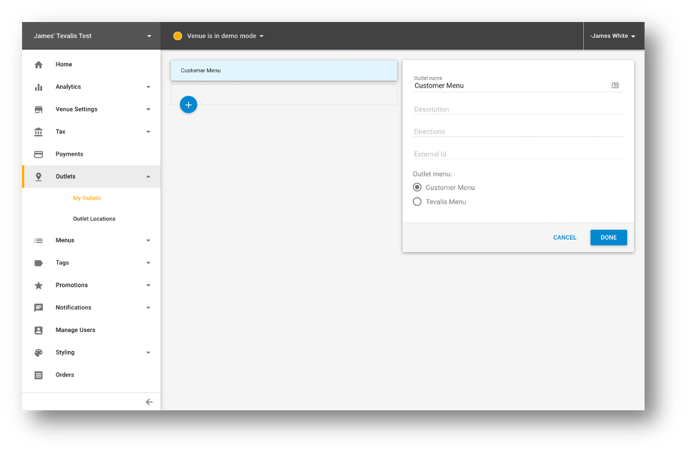
Once you are happy with how your menu looks, you will need to display this menu on your Web Orders URL. To do this, click on the ‘Outlets’ tab of your dashboard, then ‘My Outlets’. Create an outlet by clicking on the blue ‘+' sign and naming it. Where it shows 'Outlet menu’ and a choice of Customer Menu and Tevalis Menu, select Customer Menu.
-
Your set up is now complete. If you would like to add new items or make any changes to internal item names, prices or tax information, these must be done on the Tevalis POS and then synced with your dashboard through the Update External Menus feature described before.