
Create sync schedules for your venues to update menus and items from the POS
Please note: This is a feature please reach out to support@qikserve.com to have this enabled for your account - This feature is only supported by these POS providers:
- Simphony
Sync Definition: Sync is the action of matching the availability and price of items/modifiers on your POS with the same items and modifiers on your qikserve dashboard/menu
How to Create a Sync Schedule
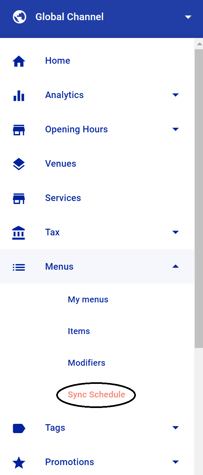
Step 1 - Finding Sync Schedule
Once the feature has been enabled for your account, you'll be able to find the sync schedule tab on your Global Dashboard.
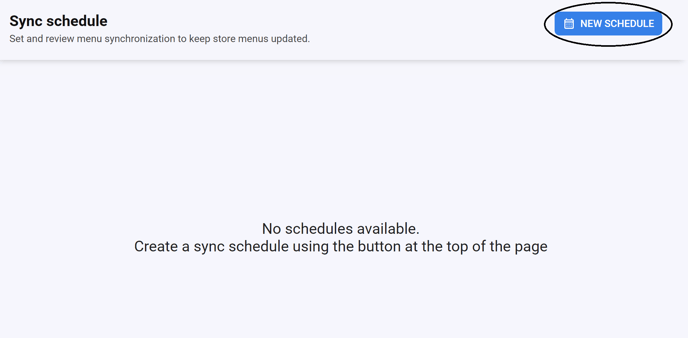
Step 2 - Creating a new schedule
After you have selected the tab you will be shown this screen, here you will be shown all created sync schedules and given the option to create an new schedule.
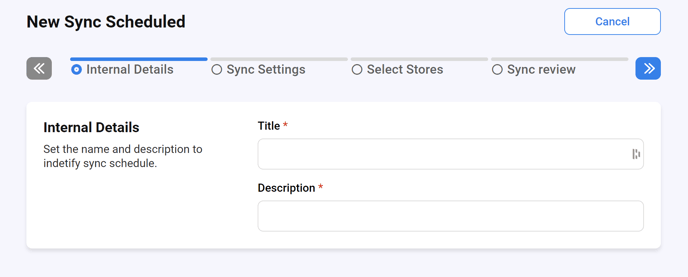
Step 3 - Setting Title and Description
After Selecting "New Schedule"you are then able to set the title and description of your new schedule.
Step 4 - Data Settings & Sync Schedule
Here we can select what data we wish the sync to check for and update, the options are:
Price - When the sync runs it will only update the prices of items if they have changed.
Availability - When the sync runs it will only update the availability of the item.
Both options can be selected or just one.
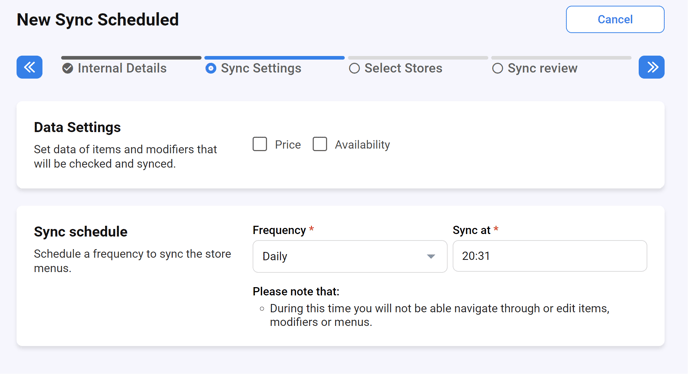
The frequency can also be adjusted, the options are:
Daily: Used if you would like the sync to be daily, you can also set at what time the sync runs at.
Weekly: Used if you would like the sync to run once or multiples times a week, if you select this option you will be shown the days of the week and asked to select which days for the sync to run.
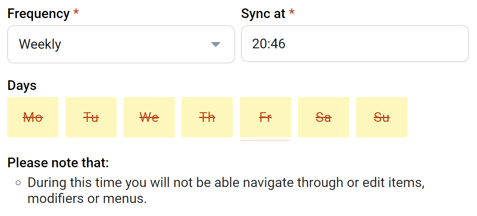
None: This is a manual way for syncing the menu, to only be actioned when used.
Please Note: There is a further options of sync per minutes, please reach ouch to support@qikserve.com for this option to be added your account
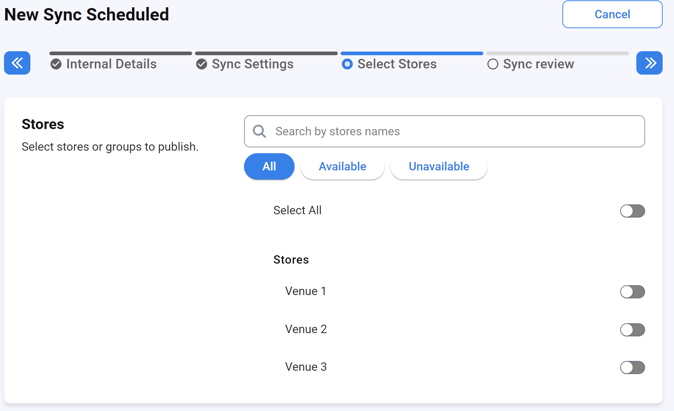
Step 5 - Select Stores
This part allows to select which stores will run the sync, you can select as many or as little as you like.
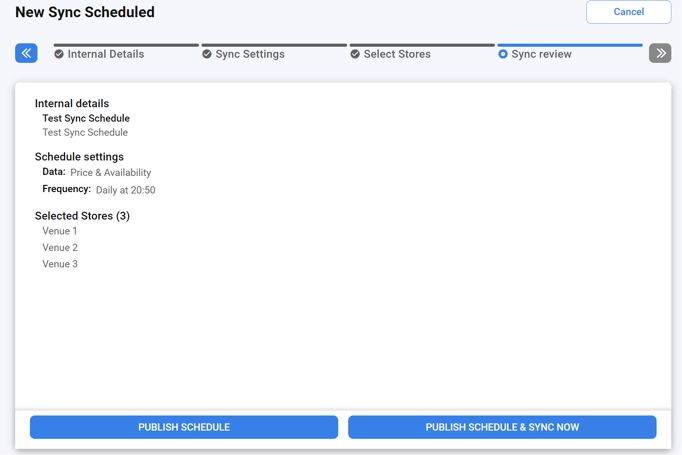
Step 6 - Sync Review
The final part will be a review of all the settings you have selected, here you can review the Sync Schedule and select one of two options:
Publish Schedule: This will publish the sync schedule and only sync during the selected schedule as selected in step 4.
or
Publish Schedule & Sync Now: This will do the same as the other option however it will do a sync after being published
How to use
This page will show all of your created "Sync Schedules". You have a couple of tools when on this screen.
Sort Schedules
You can sort the schedules you see by the frequency:

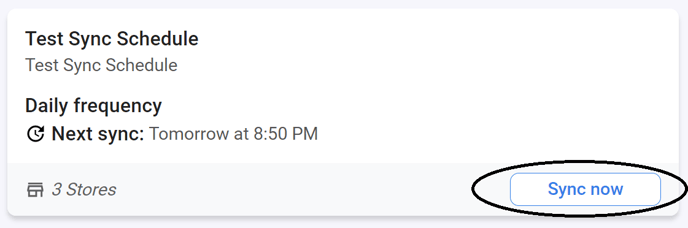
Run Syncs
If you would like to run a sync manually, you are free to do so by pressing the "Sync now" button.
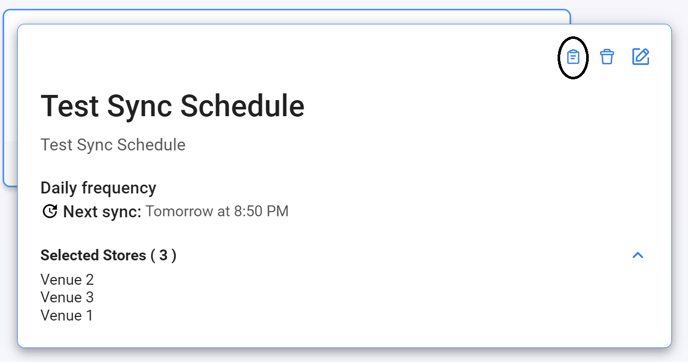
Delete & Edit Menu syncs
To delete or edit a sync schedule, you will need to click on the menu sync you wish to interact with and the options will appear:

View Sync Logs
Viewing sync logs is great way to tell if a sync has been successful or if they have failed, it will also give a reason for the sync failing.
To view the logs click on the sync you wish to view the logs for and select the "Log Details" button.
Once you have selected the "Log Details" button you will be re-directed to this screen that will show the logs of all the syncs that schedule has ran.
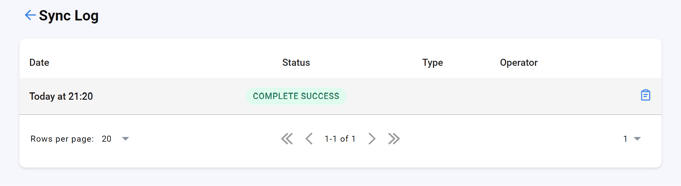
You can view further details on the sync by clicking the clipboard icon on the right.
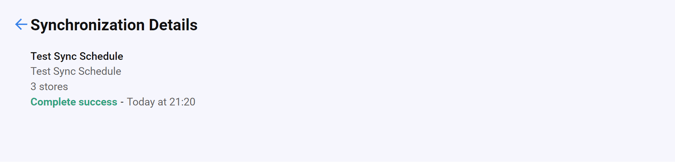
Please Note: If you are having issue with syncs please look at the synchronization details and send the error message to support@qikserve.com