- Knowledge Base
- Order Management
- Hardware
Qikserve Printer App (Android only)
This article will show you how to add a printer via the Preoday Printer App on Android device
-
Download the Preoday Printer app from the Google Play store. Please note that the Preoday Printer app works best on an Android tablet with a 10 inch screen or larger.
-
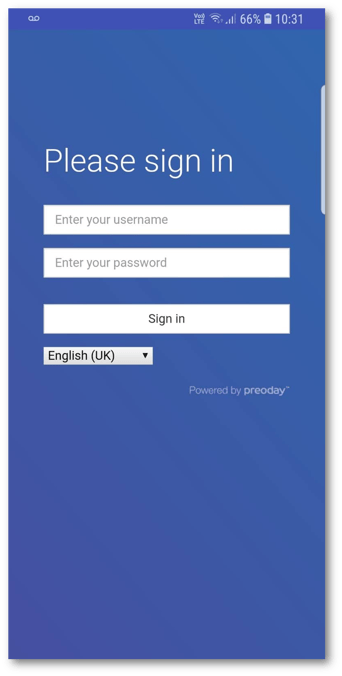
Enter your user information and log in.
-
Next, enter the name of your store into the 'Venue switch' box and click 'Search'. Choose your store from the drop down box and select 'Save'.
-
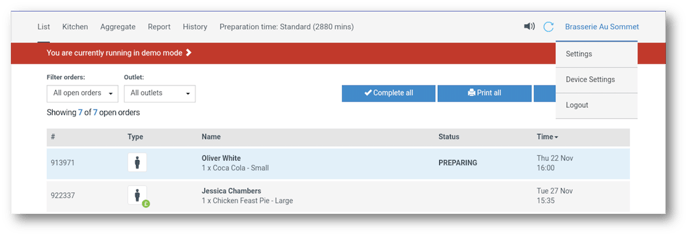
You will now be presented with your Expo Order Screen. Click on your store name in the top right hand corner and select 'Device Settings'.
-
Here you will need to enter the IP address of your printer. Ensure that the IP address is correct and that you are connected to the same WiFi network as the printer. The Emulation to select will depend on the model of printer you have (choose EscPOS for the Epsom TMm30, V2Sunmi for V2 Sunmi Pro or StarGraphic for the Star TSP printers). Select 'Ok' to save your settings.

-
You should now be able to print orders via your Expo Order Screen.
-
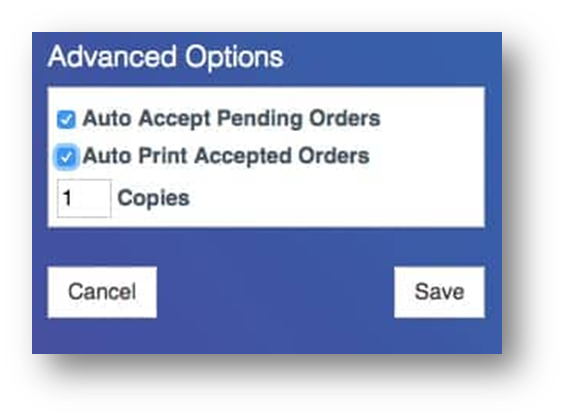
To auto-accept / auto-print orders, navigate back to the Expo Order Screen, click on your store name in the top right hand corner and select 'Settings'. Under 'Advanced Options' tick Auto Accept Pending Orders and Auto Print Accepted Orders.