
If you have multiple stores then you most likely have a Global Dashboard.
You can easily share styling for Online Ordering and email across multiple stores, and also create different styling themes if you have different looks for different stores/groups of stores. Lastly, if you want to give your multi-store/channel landing page it’s own style then you can do that too - particularly handy if you are a food hall or a theme park, or other multi brand organisation.
Channel landing page Styling needs to be requested to be turned on for your Dashboard. Please let us know at Support@QikServe.com, this is a free service
Channel landing page Styling
If you make use of the channel landing page then you can give it it’s own styling.
-
Navigate to your Global Dashboard on QikServe, it will have a globe symbol next to the name
-
Via the left hand side menu go to Styling and then Channel Styling
-
Here you have access to change the colour scheme and upload a logo and a background image
-
Under the ‘Store selection list’ you have a drop down of options to choose from which changes the heading above the list of stores on your channel
Online Ordering Styling
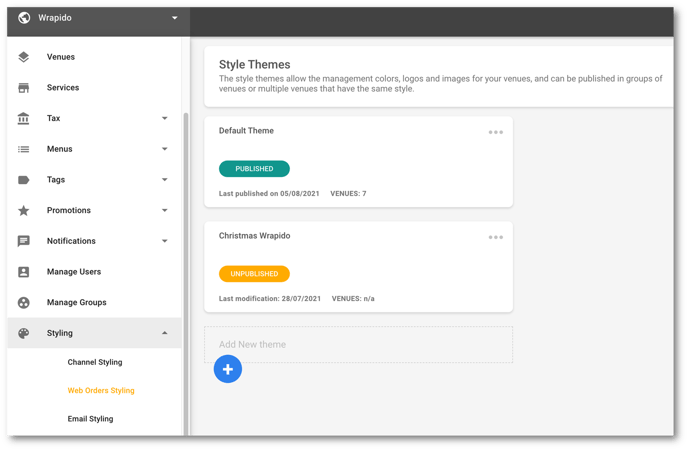
Themes
You can create multiple styling themes and choose which store(s) to apply them to, and the Dashboard will tell you when a change was last published and to how many stores a theme is applied to.
-
To create a new theme click the blue + button, or you can duplicate a previous theme by hovering over the three dots and selecting the duplicate button. You can also click on any of the themes to edit that particular theme
-
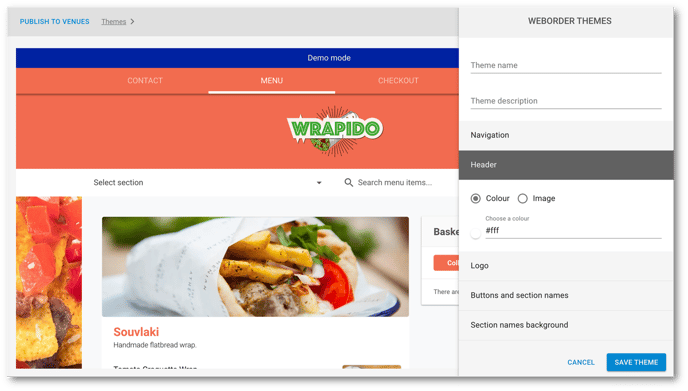
Once you have a new theme or are editing an saved theme you will be familiar with the layout if you have used Web order styling before. Click on any section such as the logo, or some of the buttons to bring up the change menu on the right hand side
-
Give your theme a name and a description
-
Make any stylistic changes that you wish
-
Click the blue Save Theme button in the bottom right hand corner of the page, and a green notification will confirm you have saved your settings
-
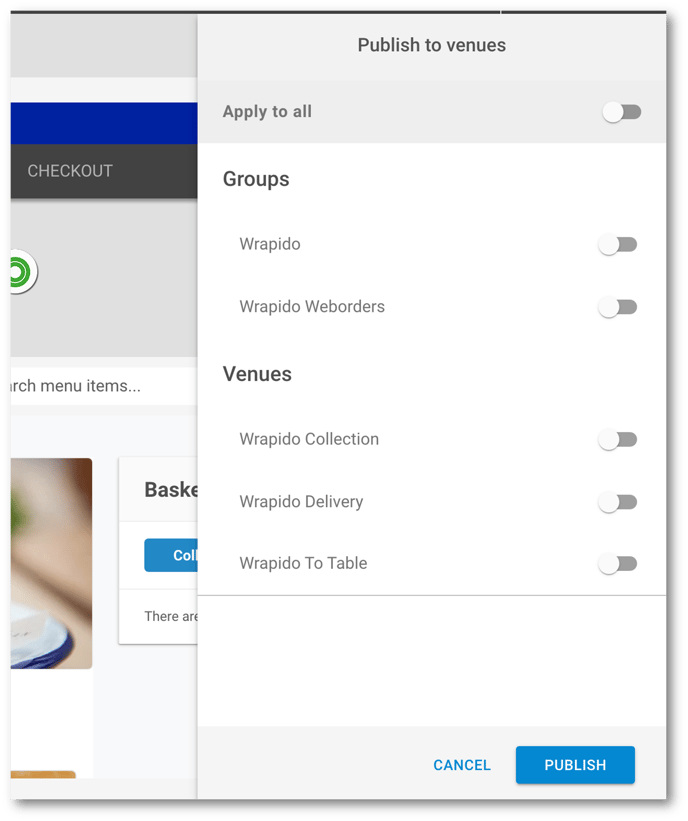
Now you have your theme saved, you need to publish this to your stores. Click the blue Publish to Venues at the top left hand side of the page
-
Choose which Groups or Stores to apply this theme to and click Publish
-
A green notification will let you know that your theme has been published and you will see that the last published date has changed on your dash on the Styling > Web Orders Styling themes page
Make sure to click Publish after you make a change to a theme. If you click Save, the theme will save any changes you have made but it will not publish these changes automatically to the stores that you have it applied to.
If you want to change the stores associated with each group, you can set that via Manage Groups on your Global Dashboard.
Email Styling
Much the same as individual store level email styling you can apply a header and footer to emails that go to your customers, and decide which stores or groups to apply this to via Styling > Email Styling. There is no saving of themes here, but you can give different stores different email styling settings.